Woodland® Quality Brands Presents...
HO Scale Products
-
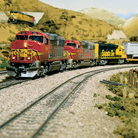
![Layout Systems]()
-
![Roadbed/Track-Bed<sup>®</sup>]()
Roadbed/Track-Bed®
Frequently Asked Questions
-
What are the HO scale track measurements from rail to rail, and also tie to tie.
NMRA standards note minimum and maximum values, instead of limits, for Prototype HO (1:87) track.Measurements (inside rail to inside rail)Minimum 16.48 mmMaximum 16.84 mmThere are no NMRA standards for ties.If you are not concerned about NMRA standards, below are general measurements.HO TrackApproximately 16.5 mm from inside rail to inside rail.TiesReal World (HO scale)Length: 102" (1.17" / 29.6 mm)Width: 9" (0.103" / 2.6 mm)Height: 7" (0.08" / 2 mm)Center-to-Center Spacing: 19.5"-21" (0.22"-0.24" / 5.6 mm-6.1) mm
-
After I have glued the Track-Bed to my table top and it dries, can I use plastic screws to further secure my track to the Track-Bed?
We do not manufacture plastic screws and have never tested their usage. This is how we recommend you attach track to your Track-Bed.
We recommend using Foam Tack Glue. Sand surface of Track-Bed with 120-grit sandpaper, then spread a thin layer of glue over the Track-Bed surface and install track. Pin in place with Foam Nails while drying. -
How do I attach Track and Track-Bed to my layout?
We recommend using Foam Tack Glue to attach Track-Bed and Track to a layout.There are different application methods for attaching Track-Bed to your layout depending on the base material.Plaster surfaces: Spread a thin, even layer of Foam Tack Glue where Track-Bed will be installed. Lay Track-Bed and pin in place with Foam Nails to secure while drying. Work in two to three-foot sections. This application method also allows the modeler to make adjustments while installing Track-Bed.A permanent application method for plaster and other surfaces: Use the Contact Gluing Method. Apply Foam Tack Glue to both contact surfaces. Let dry until clear and tacky (maximum working time is 1 hour), and then press Track-Bed in place. Installation of Track-Bed has to be precise, because glue will bond instantly. Place Track-Bed in manageable sections.For both application methods, we recommend sanding the top and bottom surface of Track-Bed with 120-grit sandpaper before installation.To attach your track to the Track-Bed, spread a thin, even layer of Foam Tack Glue on top of the Track-Bed. Place pieces of track on glue and pin in place with Foam Nails to secure while drying.
Click here to view a video on installing Track-Bed.
-
What is the minimum radius for N, HO and O scale Track-Bed?
The minimum turn radius for:N scale 9 1/2" - 9 3/4"HO scale 15"O scale 27"
-
Is the HO Track-Bed (roadbed) compatible with OO track?
HO Scale Track Bed (roadbed) is compatible with OO Gauge track.
-
What are the HO scale track measurements from rail to rail, and also tie to tie.
-
![Tidy-Track<sup>®</sup> Rail and Wheel Maintenance System]()
Tidy-Track® Rail and Wheel Maintenance System
Frequently Asked Questions
-
Will the dust monkey work with HOn3?
Yes. N Scale Dust Monkeys will work with HOn3 rolling stock and track.
-
Can the roto wheel cleaner be used with HOn3 scale?
No. The Roto Wheel Cleaners were designed to be used with standard N and HO scale trains.
-
Instructions say the Rail Tracker™ Cleaning Kit can be used directly on the track. Would it work on a Test Track (with a fuse) just as well as on the regular track?
The Rail Tracker Cleaning Kit can be used to clean Test Track. Clean in the same manner as regular track, per product instructions.
-
Will the dust monkey work with HOn3?
-
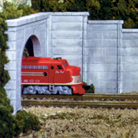
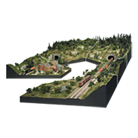
![Terrain Structures]()
Terrain Structures
-
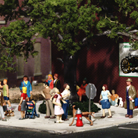
![Figures & Accents]()
Figures & Accents
Frequently Asked Questions
-
How tall are the figures in the Ice Skaters HO?
The adult figures are approximately 7/8" (22 mm) tall and child figures range between 5/8"-3/4" (16 mm-19 mm).
-
I broke a Scenic Accent, how do I fix it?
We recommend using cyanoacrylate adhesive (CA glue/super glue) to reattach broken pieces on a Scenic Accent. Use only a very small amount, a little goes a long way. Apply with a toothpick and press together. Hold until setting begins.
-
What are the ratios of the different scales?
Model Scales
G = 1:24
O = 1:48
S = 1:64
OO = 1:76.2
HO = 1:87
N = 1:160
Z = 1:220
-
What glue should I use to attach Scenic Accents and Auto Scenes to my layout?
To attach figures use Scenic Accents Glue. This adhesive is specially formulated for instant placement while allowing time for repositioning and leaving no puddles or residue.
-
How tall are the figures in the Ice Skaters HO?
-
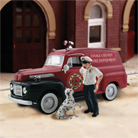
![Vehicles]()
Vehicles
Frequently Asked Questions
-
What are the ratios of the different scales?
Model Scales
G = 1:24
O = 1:48
S = 1:64
OO = 1:76.2
HO = 1:87
N = 1:160
Z = 1:220
-
What glue should I use to attach Scenic Accents and Auto Scenes to my layout?
To attach figures use Scenic Accents Glue. This adhesive is specially formulated for instant placement while allowing time for repositioning and leaving no puddles or residue.
-
What are the ratios of the different scales?
-
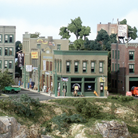
![Buildings]()
Buildings
Frequently Asked Questions
-
How do I prevent the walls of my buildings from glowing and light leaking from seams?
Use the Just Plug Light Block Kit. Apply Masking Paint to interior walls to keep the building from glowing. Press the included Ribbon Putty into interior corners, joints, and along the bottom edges of structures to seal the seams.
Click here to see a video on using the Light Block Kit to prevent glow.
-
No decals were included with the DPM building kit I purchased. I can't find them on your site, what do I use?
Decals are not included with the basic DPM Building Kits. We do offer a complete line of Dry Transfer Decals and Model Graphics that include a wide array of letters, numbers and signage to meet your needs.
-
The back wall of some DPM kits is too wide, what should I do to correct this?
The back walls appear wider due to draft angles. Draft angles are necessary for removing the walls from the mold. Following the kit instructions, sand beveled edges (draft angles) on walls until flat and fit squarely together.
-
What material are the building structures made of?
Our Buildings and Building Kits are mainly injection-molded styrene. Some of the building details are molded slick plastic.
-
How do I reattach details to a Built-&-Ready?
We recommend cyanoacrylate adhesive (CA glue/super glue) for reattaching details. Before gluing, sand off excess glue from glue points with fine-grade sandpaper. Remember, with CA glue less is more. If too much glue is applied, the piece will not set and dry. Use a straight pin to apply a tiny amount of glue to both contact surfaces. Reattach detail and hold until setting begins (approximately 30 seconds).
-
What paint colors were used to paint Rocky's Tavern.
The Scenic Details kit Rocky's Tavern was painted with the following paint colors.Brick Walls (base color) - Floquil® “Brick”
Random Bricks – Polly Scale™ “Antique White” and “Rail Brown”
Stone along bottom of walls – Polly Scale “CN Gray” and “Aged Concrete”Weather the structure with a Weathering Wash. Mix 1-part acrylic paint (Concrete or Aged Concrete), 12-parts rubbing alcohol, 8-parts water and 1 drop liquid dish soap. Using a paintbrush, dab on small amounts of wash until desired look is achieved. Sponge off excess. -
Do you have any painting and weathering tips for your building kits?
Yes, we do!Colors are your choice, but we recommend natural brick colors such as rust, tan or other earth tones. Paint door and window trim the same color as the brick or a contrasting color.Painting
Airbrush or Hand-brush: Flat finish paint
Aerosol: Flat finish spray paintInterior LightingBuildings may not be light-ready, but some modelers are adept at adding lighting. If lighting a building, reduce interior glare by painting interior walls and underside of roof flat earth-tone color.Weathering
Weathering Wash: Using a paintbrush, dab on small amounts of wash (formula follows) until desired look is achieved. Sponge off excess.
Formula: Mix 1-part acrylic paint (color suggestion: concrete or aged concrete), 12-parts rubbing alcohol, 8-parts water and 1 drop liquid dish soap.
Airbrush: Lightly spray thinned flat black paint (color suggestion: grimy black) to areas where natural discoloration can occur (near windows, chimneys, etc.).
Chalk: Rub a dark color of pastel chalk (color suggestion: gray, black, brown, etc.) on sandpaper to create a chalk dust. Using a paintbrush, dab chalk dust where discoloration can occur. -
Do your modular system wall sections have a brick detail or are they smooth?
N, HO and O scale Modular System Wall Sections have brick detail.
-
What colors were used to paint Sonny's Super Service Building Kit pictured on the box?
Below are the paint colors used to paint the Landmark Structure Building Kit - Sonny's Super Service . Additional painting and weathering tips can be found on the back of the instructions booklet.Building Base Color: Floquil® - Wisconsin Central GoldRoof: Floquil - Daylight RedRandom Bricks: Polly Scale™ - Earth Brown
Trim: Polly Scale - TTX YellowApply a Weathering Wash on top of dried base color and roof. Using a paintbrush, dab on small amounts of wash (formula follows) until desired look is achieved. Sponge off excess.
Formula: Mix 1-part acrylic paint (color suggestion: concrete or aged concrete), 12-parts rubbing alcohol, 8-parts water and 1 drop liquid dish soap. -
What are the ratios of the different scales?
Model Scales
G = 1:24
O = 1:48
S = 1:64
OO = 1:76.2
HO = 1:87
N = 1:160
Z = 1:220
-
Can I "scribe" and "snap" the DPM wall material?
Yes, you can.
-
How do I prevent the walls of my buildings from glowing and light leaking from seams?
-
![Just Plug<sup>®</sup> Lighting System]()
Just Plug® Lighting System
Frequently Asked Questions
-
How many Just Plug Extension Cables can I connect together without compromising the light brightness?
Up to 50 Extension Cables can be connected together without compromising light brightness.
-
What DC or AC voltage train power pack is required to power the Just Plug Light Hubs?
Just Plug Light Hubs can be powered with either DC or AC power. We recommend using 16-20VAC or 24VDC. If a lower AC or DC voltage is used, the light may be dimmer. Do not exceed 20VAC or 24VDC.
-
How many lights can the Just Plug Power Supply support?
The rated output for the Power Supply is 1000 milliamps (mA). To determine the total number of Just Plug LED Lights the Power Supply can support, add up the milliamps of each LED Light being used. The milliamps are listed on the light packages. Total number of milliamps should not exceed 1000mA per Power Supply. If 1000mA is exceeded, the Power Supply's non-replaceable thermal fuse will be overloaded.
-
Can more than one Just Plug Nano or Stick-On light plug into one port on the Light Hub?
Yes, you can use up to 4 lights with the Just Plug Port Sharing Device.
-
Can you make grade crossing lights with Just Plug LED Nano Lights?
We have created grade crossing signals with Red Flashing LED Nano Lights. Run and glue the LED wire alongside the pole and crossing bar. Drill a hole through the bar and light fixture large enough for the Nano Light to fit through and super glue it in place. Camouflage the wire by painting it the same color as the pole and crossing bar.
There are many different types of grade crossing signals. We cannot guarantee this technique will work for your particular signal. -
Can you use the Just Plug System with non-Woodland Scenics bulbs?
The Just Plug Lighting System is made to be used with Just Plug products.
-
Where do I hook up my DCC to the Just Plug System?
To connect the Just Plug Lighting System to DCC, use a Connecting Cable .Plug one end of the Connecting Cable into the CTRL Port on a Light Hub or Expansion Hub (JP5702). The other end of the Connecting Cable will be connected to a DCC relay unit (per DCC manufacturer instructions).
-
What is the voltage for each Light Hub Port?
Light Hub Ports are designed as current sources, not voltage sources. Each Light Hub Port provides up to 30 milliamps (mA) of current.
-
The Just Plug Auxilliary Switch controls which ports?
The Auxiliary Switch controls the ports that are to the right of the CTRL Port on Expansion Hubs and Light Hubs.
Click here to view a video about the Auxiliary Switch and port control.
-
What is the difference between a warm white light and a cool white light in the Just Plug Lighting System?
Warm white has a yellow undertone, commonly attributed to an incandescent bulb and cool white has a blue undertone, commonly attributed to a fluorescent bulb.
-
While using the Just Plug system, will I be able to control light brightness with my DCC relay unit?
No. You will be able to turn lights ON/Off remotely with DCC, but the dimmer controls on the Light Hubs will need to be adjusted manually.
-
Can the speed of the flashing LED Lights in the Just Plug Lighting System be adjusted?
No. The flashing speed of a Nano LED Flashing Lights is not adjustable, only the brightness.
-
How do I extend the length of my Just Plug Power Supply?
You can extend the length of your Just Plug Power Supply cable with an Extension Cable or our Extension Wire and Splicer Plugs.
-
I want to buy more of the lights included in the Lights & Hub Set. What is the item number?
The lights included with the Lights & Hub Set are Warm White LED Stick-On Lights.
-
Can you mix the different style of Street and Wall Mount lights up with one linker plug?
Yes, you can mix different styles of Street and Wall Mount Lights on one Linker Plug, just be sure not to exceed the number of lights in any one package.
-
Which Just Plug Lighting System Lights are the same color as your old lighting kits?
In the White Light Kit, the white lights are similar in color to the Just Plug LED - Cool White.
In the White/Amber Light Kit, the white lights are similar in color to Cool White and the amber lights are similar in color to Yellow. -
How many Street or Wall Mount Lights can be included in one linker plug?
The product was designed so that the number of lights in each package can be connected to the included Linker Plug.
-
What size are the Nano Light bulbs?
Just Plug Nano LED Lights measure 0.5 mm x 1 mm.
-
How many Just Plug Extension Cables can I connect together without compromising the light brightness?
-
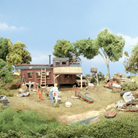
![Scene Kits]()
Scene Kits
Frequently Asked Questions
-
How do I glue together metal castings?
Always begin by washing the metal castings in warm, soapy water. Rinse well and let dry. This will remove any remaining mold release agent and allow the glue and paint to adhere better.
Glue Metal Castings with fast-setting epoxy or cyanoacrylate adhesive (super glue).
When using super glue, a good bond depends on surface contact. Super glue is not filler-type glue. Use sparingly, too much glue will make a poor bond. Apply a tiny drop onto one of the parts being glued, then hold parts together for about 10 seconds. For larger Castings, hold parts together and apply a small drop of glue where parts meet. Capillary action allows the glue to seep into the contact area, creating a strong bond.
Allow glue to dry completely before moving to the next construction step.
If the metal castings were painted prior to assembly, be sure to scrape paint off glue points.
-
How do I glue together metal castings?